Monday, 26 May 2025

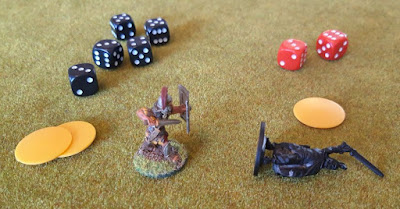
Midgard : Scenario 2 : Encounter in the Mist

Today is the second UK Bank Holiday for this month, and I was able to get onto the dining room table again to play the second game in my Midgard : Britannia campaign. The table size limit of 6' x 3' did not hamper the set up of this scenario either.

This battle report is for the second encounter between the Romans and the Britons in the campaign game - Encounter in the Mist. Again, I am playing solo, so will be using some of the last game's pre-determined tactics. That said, I learned a lot from the last game and will amend the Briton's tactics a little, as well as using a few things I missed from the rules last time (I will be looking more into the Support rules).

Both armies are evenly matched despite the casualties taken in the last game and the number of reinforcements.

Britons (243pts):

Total Points = 243 (Heroes 97pts, Units 146pts)
Total Rep = 27 (6 3 2 4 4 2 4 2)
Rep Tokens = 8
  • Bellicus 3 (47pts)
  • Maviloduus 2 (32pts)
  • Catuarus 1 (18pts)
  • 2x Warriors 3 (44pts)
  • 2x skyclad (32pts)
  • 2x slingers (20pts)
  • 2x Warriors 2 (34pts)
  • 1x Female Warriors (16pts)

Romans (245pts):

Total Points = 245 (Heroes 99pts, Units 146pts)
Total Rep = 25 (5 4 2 6 6 2)
Rep Tokens = 8
  • Lucius Valerius Corvus 3 (43pts)
  • Marcus Aurelius Bellator 2 (35pts)
  • Gaia Pomponia Thrax 2 (21pts)
  • 2x Legionaries (68pts)
  • 2x Archers (58pts)
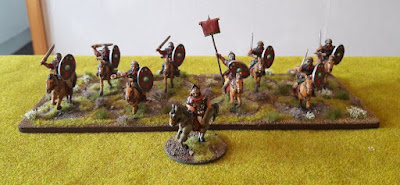
  • 1x Cavalry (20pts)

For this battle, I used Scenario 4 from the main Midgard rulebook : Encounter in the Mist

The playing area is 6' by 3', but, as mentioned above, I was able to get the deployments to the correct distances on the table.

Intended army deployments

I rolled that the Britons would be the defenders again (they are guarding the way between the Roman retreat and their next destination - a small Roman encampment) and they took Deployment Zone A. Therefore, the Romans are classed as the attackers and took Deployment Zone B.

The two armies are divided into three contingents, a vanguard, a centre and a rearguard, and will be subject to the pre-game random adjustments after initial deployment to take into account the foggy conditions as per the rules.

Briton contingents...
Vanguard: Maviloduus, Warriors 2
Centre: Bellicus, Warriors 3
Rearguard: Catuarus, Slingers, Skyclad, Female Warriors
 
Intended Briton deployment
 
Roman contingents...
Vanguard: Lucius Valerius, Cavalry
Centre: Marcus Aurelius, Legionaries
Rearguard: Gaia Pomponia, Archers
 
Intended Roman deployment
 
After the retreat by Bellicus, Lucius Valerius set a watch and ordered his men to search the burned watchtower for signs of the century that was stationed there. There were just one or two blackened bodies in the ruins, and the tower and its outer defences were pretty much destroyed. Lucius Valerius wondered what might have happened to his legionaries but that thought had to be put aside for a while, until the remainder of his small force had dug their customary marching camp and posted sentries.

A few hours into the early evening watch, just before dusk, he heard a commotion and feared the worst. A few minutes later, he could hear some cheers from the soldiers outside that gradually rose in volume. He stood up from his field desk where he was writing the day's report, and stepped outside of his tent. He was greeted with a wondrous sight. An almost full century of legionaries came marching into the camp.

He called for his senior officers to attend him and listened to the report of the missing unit. According to the centurion of the unit, Septimius Fulgencio, the bulk of them had gone on patrol, leaving a skeleton crew behind. They got back to find the watchtower completely ruined, so decided to march to the next encampment. Unfortunately, their way was blocked by the army that had destroyed the watchtower, so they moved deep into the woods and watched the enemy movements until they had passed from sight. The scouts then followed the Briton army, saw the battle between them and the cohort begin, and rushed back to inform their centurion of the situation. Septimius Fulgencio started back to the ruined watchtower in order to aid the rest of the cohort but, alas, arrived too late to aid in the battle.

Lucius Valerius, listened to the tale and decided that Septimius Fulgencio had done all he could to heed the safety of his men. He decided he was not a coward, but he was not happy that he was not there to support the cohort in its time of need. As a result, Septimius's century was put on guard duty for the rest of the night.

The following morning, a thick fog had arisen from the nearby river valley. Lucius Valerius decided that they must join up with more of the cohort if they were to make it back to civilisation, so struck camp and began their march early. All went well until they were within a short distance of small village on their side of the river. The scouts reported back that they had heard a large party of warriors approaching their current position. It seemed as good a place as any for a battle, so Lucius Valerius deployed his troops to meet the oncoming threat.

The wounded from the previous battle at the ruined watchtower were sent on their way, via a small path through the forest, with most of the supplies in the hope that the forthcoming battle would distract any of the Britons from attacking them. The prefect hoped that they would make it to the encampment to warn the forces there of the cohort's impending arrival, and to tell them to prepare for evacuation.

Bellicus had returned to one of his main villages and recruited more warriors to bolster his forces. A minor chieftain named Catuarus added his small force to Bellicus's army and they marched back to find the Romans in order to finish them off.

The warband arrived early morning at the village, but the fog had caused the warrior bands to become split up somewhat and they all seemed to arrive at different times and not where they were supposed to. Bellicus hoped that the fog affected the Romans in the same way.
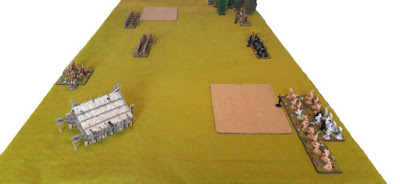
Actual army deployments due to the effects of the fog

The Romans arrived more or less where they intended, but more dispersed than they would ordinarily have deployed. Bellicus's skirmishers arrived way off to the left of their flank and would have to contend with a bit of boggy, rough ground in order to have a say in the forthcoming battle.

As the fog was too thick to see through properly, any challenges prior to the battle were not forthcoming. In the grim, eery silence the two forces advanced upon one another in the hope of surprising their enemy.

Turn 1 (Reputation B8, R8):

Each army could partially see each other through the mist and desperately wanted to come to blows. The Romans advanced cautiously in order to keep their lines, but the Britons streamed ahead where they could; the rough ground and woods slowed some of the skirmishers and young blood warriors meaning that their lines began to fray.

Turn 1 - The Britons' advance is hampered by many failed Command Tests

Turn 2 (Rep B8, R8):

As each side  advanced towards the other, the fog showed no signs of abating. Lucius Valerius took advantage of the Britons' troubles with the rough ground and charged into one of the slinger units that looked like it was on its own. Although the skirmishers were able to get off a volley of shots, narrowly missing Valerius, the impetus of the cavalry mowed them down to a man.

The rest of the skirmishers in the rough area split to achieve different objectives. The second unit of slingers shot a volley of stones at the cavalry, but the bullets that hit just pinged off of the Roman armour. The female warriors, seeing dozens of their men falling at the swords of the Romans, advanced to where they thought the cavalry would attack the remaining slingers. The skyclad, meanwhile, saw the opportunity to flank the Roman centre and advanced through the rough ground to make their presence felt, but the warband split after some confusing orders from the new chieftain Catuarus.

In the centre, Marcus Aurelius's legionaries came to blows with Bellicus's household troops. With a mighty crash of shield upon shield, the two forces fought for dominance of the centre ground. Bellicus's noble warriors were of a different mettle compared to their younger, more impetuous brethren the legionaries had faced in their previous encounter, and the Romans were forced back by the force of Bellicus's will and the defenders' skill at arms. Warriors fell on both sides and Marcus Aurelius took a mighty blow during the initial exchange.

Bellicus, sensing an easy victory with the Romans' retreat, spurred his men onto greater efforts and the Britons followed up the melee. There followed a gruelling test of strength with the Romans just taking the edge in the combat overall, but Bellicus's elite troops managed to kill the Roman Primus Pilus. His final actions, though, saw him and a few trusted legionaries destroy the remnants of Bellicus's warband with a cry of "Though I die, I smite thee!" as he fell.

On their left flank, the Roman archers could not make out the enemy approaching until it was too late. With whoops of anticipation the British warriors ran headlong into the last-second Roman arrow storm, but this did not stop their charge. Maviloduus and his warrior band pushed one century of archers back into the rough ground with ease. Gaia Pomponia was able to halt the attack on the right, but not without picking up another injury; the cuts and bruises she had amassed from the battle the day before had taken their toll on her.

Turn 2 - An intense melee ensues but the Romans just survive the Britons' onslaught

Turn 3 (Rep B7, R9):

As the early morning wore on, the fog still showed no signs of abating. Lucius Valerius saw that he was being flanked by a number of enemy skirmisher warbands, but no matter how hard he tried he was unable to get his men to turn and face the enemy. More slingshot rattled against the unit's armour as the warrior women charged closer.

Hoping to keep their advantage in the centre, the Roman legionaries stepped up their assault on Bellicus's elite warriors. They pushed through the destroyed warband, forcing Bellicus into the other unit of warriors, and pressed their advantage. However, the Briton leader's carp's tongue sword carved its way through his enemy's ranks with ease, forcing the hard-pushed century backwards. The Roman legionaries left in the centre saw the rapidly approaching skyclad warriors and fought for their lives against a renewed British assault. Unfortunately for them, Bellicus's Legendary Weapon proved to be their undoing and the century was destroyed.

The combat in the rough ground to left of the Roman lines was beginning to take its toll on both sides. Maviloduus and his warband of youthful warriors pushed the Roman archers back further into the rough and finally destroyed them as a unit, but the Britons' left flank in the rough had crumbled allowing the other archer unit to escape the melee and regroup.

Turn 3 - the tide of battle turns slightly in favour of the Britons

Turn 4 (Rep B5, R3):

The fog still refused to clear, even though the sun was trying to burn it away. The misty conditions were obviously beginning to favour the British forces as they were more used to the damp, cold weather.

Hemmed in and desperate to break free, Lucius Valerius got his cavalry moving and charged the oncoming female furies. A flurry of javelins took down half of Valerius's force before the iron and hooves of the remaining cavalrymen forced back the howling banshees facing them. Lucius Valerius decided to Hold Fast rather than be charged from behind by the slingers lurking in the rough ground to their left. The slingers, encouraged by seeing such a large number of cavalrymen fall to the javelins and knives of the warrior women, cast another volley of stones at the mounted troops. The last remaining cavalrymen either fell or ran off never to be seen again, leaving the Prefect to fight on on his own.

The legionaries in the centre of the field turned about and were about to charge Bellicus's warband from behind when the skyclad warriors hove into sight, running towards them at top speed. They decided that it would be easier to charge the naked fanatics and let Gaia Pomponia's archers take care of the Briton elites, but their charge fell short. The skyclad warriors pressed their charge home but many were impaled on the swords of the legionaries.

Gaia Pomponia's archers let fly but their arrows went awry in the mist; they just could not pick out their targets well enough to make their arrows count.

Turn 4 - Lucius Valerius rides alone and the Romans are on the back foot

Turn 5 (Rep B5, R3):

As more warriors fell to the swords and shafts of their enemies, the sun began to win its battle against the fog. Patches of mist began to tear away, but would this save either side from defeat?

Lucius Valerius decided that caution formed the better part of valour and charged across the battlefield in order to join with one of his remaining units of troops. The surprise of the slingers' small victory over such a superior force momentarily stunned them and they were unable to move, but the enraged female warriors spun around and headed off in pursuit of the cowardly Roman chieftain.

The legionaries, seeing their commander racing towards them renewed their attacks on the skyclad and cut them down to a man.

Gaia Pomponia ordered her century of archers closer to the depleted elite warband of Bellicus and ordered them to loose their shafts. This time their arrows flew true, scything the last of the elite warriors down. However, her grin turned to a grimace when from directly behind the fallen elite, Bellicus formed up the last of the skyclad and charged home against the archers. The archers fell back just enough so that they wouldn't get attacked in the rear by the rapidly approaching young warriors.

Turn 5 - The last moments for the Roman archers

Turn 6 (Rep B4, R3):

The sun finally broke up the mist and the carnage of the battlefield could be seen by all. So many men and women had laid down their lives for the glory of Rome or for the honour of their tribe.

The Roman leader galloped over to the last remaining century of legionaries and ordered them to about face whilst the maiden warriors and slingers continued their pursuit.

Gaia Pomponia had no choice but to keep fighting, but with Bellicus and Catuarus in the fight they were being pushed further and further back, taking more losses as they went. She prayed to the gods that help would arrive soon, but her century was overwhelmed in a melee that they were not used to. The archers were cut down as her unit was surrounded, but she survived with just a handful of troops.

Turn 7 (Rep B4, R0):

The thunder of hooves and the roar of a fully fit, victorious century of legionaries approaching from the rear caused Bellicus and his warriors to stop advancing to finish off Gaia Pomponia and her remaining handful of archers; it made them pause long enough for Gaia to make her escape. Seeing that she was safe, the rest of the Romans left the field to the Britons.

Turn 7 - the final retreat

This game lasted six of the seven turns allowed, but it was a longer, more hard-fought battle than the previous one. The Britons managed to scrape a Narrow Victory, so some honour has been gained back by Bellicus and his warriors, but I think if deployment went a bit more in their favour this could have been a crushing victory - maybe the Romans could have been completely wiped out, thus ending the main characters of the story (although there are more Romans left from the cohort that could club together to fight on). Both sides took a lot of casualties again, which means the next game will take some thinking about to get the numbers back up for a decent skirmish.

Campaign Score: Romans 3 Britons 1

Saturday, 24 May 2025

Midgard : Campaign Scenario 1 : Aftermath

The first battle saw both sides take heavy casualties; the Britons many more than the Romans...

The Britons' losses (132pts):

  • Luconianus 1 (18pts)
  • 4x Warriors 2 (68pts)
  • 2x Archers (30pts)
  • 1x Skyclad (16pts)

The Roman losses (88pts):

  • 1x Legionaries (34pts)
  • 1x Cavalry (20pts)
  • 1x Legionaries (34pts) Hors de Combat due to reduced Stamina

I wasn't expecting so many units to be destroyed during the course of the game, but now that I am aware of the casualty rates, I may need to amend the numbers of reinforcements going forward. These are the reinforcements rolled from the tables in the previous post...

The Britons' reinforcements (68pts out of a possible 75pts):

  • 1x Level 1 Leader - replacement (no cost)
  • 1x Female Warriors (16pts)
  • 1x Warriors 2 (17pts)
  • 1x Skyclad (16pts) 
  • 1x Warriors 2 (17pts)

Briton Warrior Women

The Roman reinforcements (34pts):

  • 1x Legionaries (34pts)

Luckily the numbers match up again for the next scenario, although the forces are below the 300 point mark. Going forward I may up the numbers a bit if the armies were to become too small. I would have to adjust the narrative; maybe for the Romans I will keep their reinforcements at the same rate, but up the amount of Britons to make the game harder, and more desperate for the Romans, at each stage.

The Britons' army for scenario 2 (243pts):

  • Bellicus 3 (47pts)
  • Maviloduus 2 (32pts)
  • Level 1 Leader (18pts)
  • 2x Warriors 3 (44pts)
  • 2x skyclad (32pts)
  • 2x slingers (20pts)
  • 2x Warriors 2 (34pts)
  • 1x Female Warriors (16pts)

The Roman army for scenario 2 (245pts):

  • Lucius Valerius Corvus 3 (43pts)
  • Marcus Aurelius Bellator 2 (35pts)
  • Gaia Pomponia Thrax 2 (21pts)
  • 2x Legionaries (68pts)
  • 2x Archers (58pts)
  • 1x Cavalry (20pts)

1x Legionaries (-1St) in reserve

For the new lists, I will need to arrange for a new level 1 leader figure and base up the unit of Female Warriors for the Britons. I will also try to get some paint on a number of the unpainted figures in time for the next game to at least make them look better than just the plain black/white/flesh undercoats.

I also managed to collate and undercoat two units of Celtic Cavalry for possible later use. I am also working on some more movement trays to carry the new warrior units.

Briton Cavalry Unit 1

Briton Cavalry Unit 2

Other than putting together the two new versions of the armies, I also need to work on the story of the Roman retreat to pick up their stargglers and choose which scenario to play next based on numbers available etc. More on this in the next post hopefully.

Friday, 23 May 2025

Ghosts of Saltmarsh - The Wreck of the Tammeraut

Day 10 - The Wreck of the Tammeraut

Luckily for us, the night posed no more threats after the immense noise from the collapse of the tower floor alarmed us. We awoke to daylight pouring in through the gaps in the fortified windows. After a quick breakfast, we took stock of our surroundings. The undead had been rummaging around the hermitage again but there was no sign of them this morning, other than a few blood smears where the floor of the tower had collapsed.

The rope we had secured for easing our crossing of the unstable floor was still there, so we were able to shimmy down it and leave the tower. We explored the rest of the island over the next hour to see what we could find but there was no sign of anyone, or anything of interest; even the nest at the top of one of the mounts for that flying being that attacked us when we first arrive held nothing of value.

We decided that we should return to the main land to gather ourselves in readiness to return and investigate the wreck and fissure we had read about. Jenna became worried that we would not return but we assured her that we would; we just needed to prepare for an underwater venture. She called one of her carrier birds and a message was sent to the mainland. An hour or so later a boat arrived for us, piloted by none other than the half-orc who brought us out here a few days previously.

Around mid-morning, we arrived in the harbour and set about evaluating our finds. The magical practitioner we saw last time assisted us again, for a price, by identifying that the helmet would indeed allow its wearer to breathe underwater, and that the three potions were also for just that purpose (two doses in each vial that allowed for several hours of underwater breathing). The metal rod, we found out, had a small button on it, that when pressed, it extended and stayed in place - totally immovable - no matter where it was placed, even in mid-air, until the button was pressed again. The apothecary tried to sell us a few more potions as we mentioned that we might need spares, but at 250 Gold Crowns a vial we decided that they were too expensive. Anyway, Jenna said that she could make some small cookies that would do the same job, last a lot longer, and not cost us anything.

We left Morley at a local hostelry, with the promise that we would be back for him once we had returned from investigating the ship wreck and portal. The rest of us returned to the island, where Jenna created the magic cookies for us. We double-checked the co-ordinates on the map and headed out to sea. We tasked Jenna with creating some more of the water breathing cookies whilst we were gone, in case we had to return to the wreck later .

The Wreck of the Tammeraut

As soon as we got to the place shown on the map, Drakkon jumped straight overboard and put the helmet on. When he resurfaced he proclaimed that it worked perfectly well and that he would scout around and try to find the wreck. He came back up again after about ten to fifteen minutes and said that there was a  wreck almost directly below us about 200 feet down. I cast Light on several personal objects and passed them around so we each had a source for visibility down below if needed.

All of us, except Gladreth who decided to stay behind to protect our escape, ate the foul tasting cookies and joined Drakkon in the water. Gladreth kept the three potions and one dose of cookies just in case we needed them later. Luckily, Jenna's formula worked well and we were able to breathe under the water. After a couple of minutes planning what we would do, we all swam down into the murky depths.

The water got much colder than it should have done naturally as we swam down, and when we were only a short way from our target we noticed that there was a strange source of light. It appeared to be coming from some kind of hole; most likely the rift mentioned in the journal. We took a look at the hole first and saw that it was about three feet in diameter and looked extremely deep. We tied a rope to Drakkon and he tried to swim down it, but some magical cold force stopped him going down too far. He returned to the seabed where we were waiting. The large stone beside the hole was big enough to fit over the hole and after a lot of effort we manhandled it and lowered it into position covering the rift. We were unsure whether to put the immovable rod over it to magically keep it permanently sealed.

As soon as the hole was covered, the water began to warm up again to a more natural temperature for that depth. Unfortunately, as our attention was firmly on plugging the rift, we were suddenly attacked by a number of the sea zombies.

Drowned Ascetic - courtesy of Fantasy Grounds

They took us by surprise and managed to inflict a lot of harm on the party before we were able to rally and begin to fight them off. A quick Prayer of Healing managed to repair most of the damage we took, and the fighting resumed with Navda and Dharion taking out a couple of the zombies in quick succession. I quickly followed that up with Radiance of the Dawn which caused a lot of harm to the remaining sea demons. Drakkon destroyed another zombie with one blow of his magical sword, just as we were joined by Gladreth. She must have sensed something was wrong and decided to join us on the seabed to see if she could help. Her timing was perfect as more zombies appeared around us.

Battle for the Tammeraut


Sunday, 18 May 2025

Ghosts of Saltmarsh - Firewatch Island (Day 9 continued)

Day 9 - The Hermitage (continued)

After "seeing" the invisible entity escape towards the distillery tower, we followed to see what it might do there, and to see what might be cackling. Navda followed the invisible being thinking that it had gone up the steps of the distillery, only to be frightened out of his wits by what we assumed to be a demonic being contained within. We could not get a word out of him and he was frozen on the spot with fear.

The rest of us got closer to see what was in the distillery that caused Navda such a fright, and we espied two hideous, sea-weed covered, blue-skinned women. I asked them where they came from, but they just laughed at us. I was pushed to the ground by the, again, invisible entity so the rest of the party attacked the hags.

Dharion attempted, via one of his spells, to befriend them but they just laughed at his attempts and attacked Druss, who was nearest to them, instead.

Sea Hag - courtesy Fantasy Grounds

Outside, Gladreth swung her staff in vicious circles and managed to connect with the invisible entity which caused a hiss to come from one of the hags in the distillery. This caused the being to become visible, so I Sacred Flame it and Drakkon finished it off with his trusty sword. This caused the hags inside to curse and snarl; we had caused them to become incensed by destroying their servant.

Invisible Stalker - courtesy Fantasy Grounds

Navda, was just beginning to come out of his frightened daze when the hags cursed him again. I pushed past the frozen Navda and cast Guiding Bolt on one of the hags, which caused her a great deal of harm. This encouraged my companions to re-double their efforts. Dharion managed to pull Navda out of harm's way, which in turn allowed me to pass by the vacated spot, run up the steps to the distillery, and finally kill one of the dreaded sea demons. Gladreth and Drakkon managed to slay the other entity, who, using her dying breath muttered "Why did you not let us return to the sea?". We all had plenty of answers to that question but we turned our attention to Navda who was now slowly returning to normality from his afeared state.

We quickly returned to the pool to see what we could find within its depths, but the items turned out to be just wish-pennies. We stuffed the few copper coin into our pouches, declaring to ourselves that the wishes would have been granted, or not, by now.

Time had begun to run away from us by now, the sun had passed its zenith a number of hours ago, so we returned to the kitchen to collect Morley and Jenna. We headed around to the south side of the island where we had espied a small rowing boat the day before in the hope of escaping the island as soon as we could. Unfortunately, when we got there we noticed that it was half full of water and had a net draped over its gunwales that seemed to be pulling it down.

We pulled the net out of the water to see if we could unsnag whatever was causing the boat to ride low and realised that it contained several of the hermitage's religious monks. It was only when the net was fully pulled from the sea that the bodies began to move. We hurriedly collected a mound of driftwood and set to bashing the un-life out of the corpses. We then burned them in a pyre. It was then that we realised that there were eight of us but the boat would only carry six. No matter how we thought about getting off the island we couldn't work out a way without splitting the party too much and have the boat return for us before it got dark. We decided to settle in for a second night in the hermitage.

It was decided we would barricade ourselves in on the third floor of the tower. It was a good defensible position and we would be forewarned in plenty of time of any attempt to get near by a new wave of sea zombies.

Tower - third floor

Navda, being the most acrobatic amongst us, did most of the climbing and sent back ropes that would make the path to the third floor (across that burnt, unstable wooden flooring of the second floor) easier for the rest of us. Dharion had a slight mishap with a fall through the floor, but was able to save himself from too much harm.

In the chamber on the third floor, we cleared out all the rubble, filled the hole in the tower wall, wedged the tables and chairs against points of egress, and set watch at each of the windows. We doused all lights in readiness for a long and fretful night.

Day 10 - The Hermitage (continued)

An hour or two after sunset we began to hear noises similar to what we had heard the night before; doors being forced open, movement to and from the sea and around the rest of the hermitage. We kept as quiet as we could be in the hope that the night would eventually pass without us being found as there was no sign of the undead passing this way the previous night.

Then, about halfway through the night, there was an almighty crashing sound as if something extremely heavy had smashed something. Then there was silence.

Monday, 12 May 2025

Midgard : Britannia - Reinforcements

I made a quick ready-reckoner about reinforcements in an earlier post, but it was not set in stone. Here is an updated version that I will use for at least the first scenario's end game...

Romans in battle against Celts (Wikimedia Commons)

Losses and Reinforcements:

After each battle calculate actual losses to each surviving unit that took Stamina damage:

  • Remove figures from each unit as a percentage of Stamina lost - for example, on a 4 Stamina unit...
    • 1 Stamina loss = 25% loss of figures (if a fraction, round down results for all losses)
    • 2 Stamina loss = 50% loss of figures
    • 3 Stamina loss = 75% loss of figures
    • 4 Stamina loss - unit should have been removed from table already
  • For partially damaged units, roll a d6 for each figure lost...
    • 1-5 they are lost
    • 6 the troops managed to survive (lightly wounded, dazed, fled), so they can be returned to their original unit or to another unit of the same troop type that is understrength
  • If a unit is completely wiped out during a game, then it is lost
  • If two or more understrength units can be combined to make a whole one, then they will be, otherwise they will be put aside until multiples of understrength units can combine to create whole ones - all understrength units will be played in the final scenario at their current strength though
  • All leaders that are killed are replaced by one of the same Rank. Allocate new Traits for each one but keep points values to within a few of the original leader
  • All leaders that are injured regain 1 point of Stamina between each scenario

Before each battle, calculate reinforcements:

  • The Romans start the whole campaign with 6 centuries of legionaries, 6 centuries of auxilia and 4 turmae of cavalry. The initial starting force consisted of 3 centuries of legionaries, 2 centuries of auxilia and 2 turmae of cavalry. They will gain reinforcements depending upon which Roman camp type they are nearest to...
    • Marching camp = 2x random units (roll d6) until all are used up (4 auxilia and 2 cavalry left)
      • 1-4 Auxiliary Spearmen (up to 4 units)
      • 5 Auxiliary Archers (up to 2 units)
      • 6 Cavalry (2 units left)
    • Watch Tower = 1x unit of legionaries (3 units left)
    • In the final battle they get an onager and/or a scorpio unit in addition
    • Depending upon how casualties go, they may get a boost from the rest of the legion that has come looking for them for the final battle
  • The Britons can recruit from a limitless pool of warriors...
    • All removed units are lost
    • All damaged units are automatically returned to full strength
    • An extra 75 points awarded to spend on new units (any points left over are lost). Roll 2d6 on the table below to realise troop type, and an additional d6 if a Hero is rolled...
      • 2 Hounds (22pts)
      • 3 Female Warriors (16pts)
      • 4 Skyclad (16pts)
      • 5 Archers (15pts)
      • 6 Slingers (10pts)
      • 7-8 Warriors 2 (17pts)
      • 9 Mounted Warriors (16pts)
      • 10 Warriors 3 (22pts)
      • 11 Chariots (24pts)
      • 12 Additional Hero
        • 1-3 Level 1 (18pts)
        • 4 Druid Level 2 (27pts)
        • 5 Level 2 (32pts)
        • 6 Level 3 (47pts)
  • If the Britons win, depending on their level of victory, they will gain a bonus number of reinforcement points equal to the level of victory (0-3) x10

The reinforcement totals are in favour of the Britons: firstly, they are on home turf and are expected to be able to recruit more troops, and secondly, they are expected to take more casualties as the Roman troops are better quality unit for unit. If this proves to be a little unfair I will adjust the amount of times that recruitment can take place; maybe after battles 1, 2, 4 and prior to 6 if the numbers are too uneven?

Sunday, 11 May 2025

Ghosts of Saltmarsh - Firewatch Island (Day 9)

Day 8 - Continued)...

Just prior to bedding down for the rest of the night, we decided to collect up the remainder of the "dead" zombie bodies (about half were left after the second wave of zombies arrived to carry them away), carry them into the large stone tower along with as much of the broken furniture as we could find, and set light to them. This would both stop the sea zombies from being able to collect them and reanimate them if that is what they do, and kill off the green slime stuff that had accumulated there in the tower.

We set watches for the rest of the night but it passed without any further events.

Day 9...

We had a long rest, and began to stir around mid-morning. We decided that we should explore the rest of the hermitage, so told Jenna and Morley that we would lock them in the kitchen again, to keep them safe, and return for them once we had explored the rest of the upstairs of the building.

We headed up the main staircase and entered the room to the right at the top of the stairs. This room happened to be a hallway with a couple of doors along its length. We opened the door to the right as we entered the hall to find a room that resembled a scriptorium; lots of paper and books were scattered all over the room and tables, as well as a very large pile in the north-west corner.

Gladreth and I began to investigate the huge mound of books, paper and cloth in the corner but were surprised when it began to move. Navda, who was covering us, shot an arrow into the pile which then began to hiss frantically. Suddenly, three very large coral snakes erupted from the pile and began to attack the party. The rest of our comrades rushed into the room and we made short work of the snakes, but not before a few of us took some nasty bites.

Once the snakes had been dispatched, we were able to carry on exploring the rest of the room. Most of the papers and books were damaged beyond repair and readability, but we did garner a few snippets of information from the piles on the tables that were covered in spilt ink : a few words about a ship named The Tammeraut and something about a rift.

We decided that any further searching of this room would not reveal any more clues and treasure, so we headed back into the hallway and tried the door at the end of the corridor. This opened out onto a crenellated walkway that led to the large stone tower.

The door to the tower opened easily but a massive billow of smoke emerged as we opened it - the fire we had lit earlier had produced a lot of fumes. When the smoke had cleared, we realised that the floor had been badly damaged by the fire (but at least the slime and zombie bodies had been destroyed) and extra care would need to be taken if we stepped upon it. Luckily, Navda, the party's rogue, was very light on his feet and was able to make his way across the room to the stairway opposite.

Alone, he climbed the stairs and reported back what he observed on each floor. The third floor contained a continuation of the spiral staircase, as well as a big pile of rubble and nest materials, and a couple of tables. The nesting materials were from a natural source, seagulls and the like, so he poked around in it and found a back-pack which he sent down on a rope for us to take a look through; it contained some old clothes and three potions. The first table he investigated contained a leather-bound book, a metal rod and a small pouch containing a goodly amount of gold coins. The smaller table had more papers from which he could pick out more mentions of the sunken Tammeraut, a rift below and The Drowned.

3rd Floor of the Hermitage Tower

Navda climbed the next staircase towards a fourth floor. Above his head at the top of the staircase he encountered a trapdoor. He was able to push it open easily and climbed out onto a belfry platform with a circumference wall containing arrow slits. In the middle of the platform there was a large bronze bell with a rope attached, and a body ripped apart with its head missing; presumably Jenna's lost Aaron? However, by the body there was a message scrawled by hand in chalk and blood that said "Beware the sea killers".

3rd and 4th Floors of the Hermitage Tower

After searching around for more treasure and clues, but finding nothing more of interest, Navda returned to us on the walkway. We returned the way we came and attempted to open the last door on the floor that we had not investigated yet. There was a horrendous metallic screeching sound made as we pushed the wooden door open caused by a large mace head that had been used to stop the door. The room appeared to be some kind of bed chamber with an accompanying table and chair, and a chest. The table held what turned out to be an upturned bronze helmet, a straight razor and a very dirty, broken mirror. In the unlocked chest we found a couple of blocks of amber and a round religious icon linked to the same sea god we had seen in other rooms of the hermitage. The icon had what looked like fourteen diamonds embedded in it, so we kept it for future reference.

Upper floor of the Hermitage

After completing the search of the upstairs floor, and with our interest piqued with all of the sea god and sunken ship references, we decided to head to the library to investigate these clues further. We found many more interesting snippets but then decided to ask Jenna what she knew about the ship and the rift. After asking her to confirm that the body in the belfry was Aaron's (it was), we asked her about the clues we had found. It turned out that she held quite a bit of knowledge about the local history.

Apparently, many years ago, the Tammeraut, a famous pirate ship, began to store its riches on Firewatch Island. One day, a storm sank the ship and it was never seen again. However, many years later reports of pirates rising from the sea and attacking the hermitage became more common. A local priest began to investigate the tales and he managed to find out about a magical rift under the sea that connected a demonic portal and our world together.

We looked in the leather-bound journal we had found on the third floor of the tower with renewed vigour and discovered a few more clues. It mentioned word of a disaster; the pirate ship approached the island but was sunk in a violent storm about two miles to the south.

Putting all these clues together, we decided another trip to the library was needed now that we knew what we were looking for. We didn't find much more that we didn't already know, but we did spot, hand scrawled in the margins of a few of the books, a number of prayers and fragments of details written for the purpose of worshipping a sea god, the name Scarlet Harbinger and lines about being scared of death that awaits and a passage for safe harbour were found but they didn't mean much to us at this point. Regarding the pictures and tapestries on the walls with fresh eyes led us to find items that we had missed the first time around; I removed a picture of a galley at sea from the wall and a piece of parchment behind it fell out, which turned out to contain a map of the island and hermitage with a large X marked to the south of the island with a bunch of coordinates. Details of the sea god appeared everywhere. It is not a god I know of but it is a well-known sea god in these parts that, apparently, many ships' captains say prayers to for safe journeys.

Looking at our gathered treasures with this knowledge at hand, we thought that the helmet may be magical and the potions may be for some kind of underwater usage. We will get them assessed when we get back to town later though to confirm our suspicions.

Hermitage gardens and pool

All this talk of sea gods and treasures in a tangential way reminded me of the oval pool in the hermitage's garden. I talked my companions into having one last look around before heading back to pick up Jenna and Morley. Something had piqued my interest but I couldn't quite put my finger on it.

We made our way past the distillery and into the gardens and began investigating the pool and its environs. The pool was about three feet deep, with fairly clear water, and there were a few objects not quite discernable in its depths. Out of the corner of my eye, whilst looking into the pool, I caught glimpse of a shadow behind me. I quickly turned but could see nothing. I mentioned this to my companions but no-one had seen anything. It was then that I spotted a trail of footprints that led to the copse of trees behind us.

Gladreth and I went to investigate what we might find hidden in the undergrowth, but I was struck hard from behind and fell to the ground. I could make out no adversary when I looked around, so I asked whoever it was to show themselves. For an answer, Gladreth was also struck by this invisible being.

Meanwhile, Dharion, Druss and Drakkon clambered into the pool to get a better look at the items in its depths, and also for the water to be an early warning in case anything invisible with mass also got into the pool to attack them - they would be able to see the ripples of the being making its way toward them and they would be better able to gauge where to strike.

I was still listening and watching to see if I could see what had just attacked me. I grabbed a large handful of dust and leaves from the ground and threw it in a random direction. It just so happened to briefly outline a being that would otherwise be invisible. The shape took off at a run towards the distillery where it emitted a loud cackle.

Friday, 9 May 2025

Midgard : Battle of the Ruined Watch Tower

Lucius Valerius Corvus deployed his troops smoothly and efficiently. Yes, he was outnumbered, but from scanning the lines opposing him on the other side of the glade he was aware that his men were better armed and armoured, and his enemy had no cavalry or massed ranks of missile troops.

As he scrutinised the enemy lines for weaknesses, his thoughts turned to the fate of the garrison of the burnt-out watch tower. The Britons were renowned head-hunters but no grisly trophies were being brandished. He prayed to the gods that the men stationed here had escaped that gruesome ending and were waiting for him somewhere in the wilderness.

He decided that he would have to chance a swift advance and try to break through the enemy's lines. He had mobility on his side in the form of his cavalry, but his legionaries with their attendant baggage train would be much slower.

Combat of Champions (Reputation B9, R8):

First blood to Rome

Just as he was about to order his troops forward, Luconianus, a belligerent, proud warrior strode out from the ranks of Britons and began shouting challenges and insults at the Roman lines. He made it to the mid-way point between the two armies before he bared his chest and began beating it with his sword. He then pointed the blade at Marcus Aurelius, who held the centre of the Roman line, and offered his challenge. Ordinarily, Romans should not accept single combat challenges, but this situation was different. He looked to his commander for guidance. The prefect nodded, so Marcus Aurelius drew his gladius from its scabbard, affirmed his grip on his scutum, and advanced.

Marcus Aurelius strode towards his opponent with sword and shield at the ready, as he was trained to do in the legion's training grounds. Luconianus didn't wait for any formal salute and charged the hated Roman officer. He swung his sword high and crashed it down onto Marcus Aurelius's head, but the Roman saw the blow coming, caught the blade upon his shield and twisted away from the strike. This opened up Luconianus's flank and Marcus Aurelius wasted no time in plunging his sword into his ribs. He gave the blade a harsh twist, pulled it out sharply and was on his way back to his own lines before the proud Briton had hit the green sward.

Turn 1 (Reputation B8, R11):

The Britons howled in dismay at the loss of their champion and their war leader Bellicus began to arrange their ranks for a charge. Lucius Valerius ordered his forces to advance in an orderly fashion, dressing the lines as they went.

As the Britons came into range, there was an exchange of arrows between the formed ranks of the Roman heavy archers and the smaller, skirmishing units of the British archers. The training of the Roman milites paid off as their massed shooting caused a few of the Britons to drop, but they did not retreat.

Ignoring what was happening on his flanks, Bellicus shouted for his warriors to engage with the enemy, and they did not disappoint. The massed ranks of several hundred warriors streamed forward toward their foes.

More arrows were exchanged which caused one century of the Roman formed archers to fall back to avoid the onslaught, whilst on the other flank, stones from the slings of the British skirmishers failed to find their mark amongst Lucius Valerius's cavalry squadron.

The lines at the end of Turn 1

Turn 2 (Reputation B8, R11):

The two armies clashed in the centre of the glade whilst the archers continued to trade arrows on the Roman left flank. Several of the British archers fell and many decided to retreat from the battle. This allowed the Gallic archers, who had retreated from the Celtic arrow storm moments earlier, to turn their attention to the charging warriors and caused them to stumble which slowed their advance. Unfortunately, for the archers, the warriors were surplus to the battle lines and they turned their attention onto them.

Lucius Valerius was confident that his cavalry would mow down the naked fanatics before him but their bravery was more than he had bargained for as he saw half his troop decimated. He noted that their leader seemed to be a more seasoned warrior than the stripling who had challenged Marcus Aurelius at the start of the battle. The skyclad Britons held their lines, encouraged by the failure of the Roman cavalry to break them.

The clash between the warriors in the centre of the field ground to a halt, with both sides straining for an advantage. Casualties mounted on both sides, but mostly it was the lightly armoured Britons that were slain. However, many legionaries fell to the mystical carp's tongue sword of Bellicus, who was left standing on the left flank of the Roman lines with just a few faithful warriors after the unit opposing him annihilated his troops.


The battle at the end of Turn 2
Turn 3 (Reputation B4, R12):

Gaia Pomponia knew that her troops were better armed and protected than the remnants of their Celtic counterparts, so decided to move in and attack them in hand-to-hand combat. They stowed their bows, drew their swords and advanced on the British skirmishers. Meanwhile, in the centre of the field, the legionaries held their position due to the threat posed by the British elite household troops that had manoeuvred into position for a devastating charge.

On the Roman right wing, Lucius Valerius fought for his life. His last remaining troops fought against the naked savagery of Maviloduus and his fanatics, but they managed to halt their attack long enough to enable Lucius Valerius to extricate himself from a difficult situation.

With the loss of dozens of his warriors, and seeing that many were beginning to slip away from the battle,  Bellicus realised that he must very soon pull something out of the bag if his fortunes were to change. Backed up by his last remaining troops, he ordered the nobles into the battle. The elite, armoured warbands joined the fray, and they destroyed the Roman century before them to a man. The mystical sword of Bellicus dealt more death wherever it went.

On their left flank, the armoured Roman archers shot down all of the warriors that had attacked them, and Gaia Pomponia's unit dealt many a death blow to her enemies, but not without her taking a wound for her troubles. The remaining few Briton archers turned tail and fled as a result of this onslaught.

Momentarily out of the fighting, Bellicus took stock of what had happened to his warband and ordered his elite warriors to back off. With their leader rescued, the Britons felt it was time to leave the field to the Romans. They had lost this battle, but the Romans had taken many casualties and they would be easier to eliminate on the next occasion that they met.

Lucius Valerius breathed a sigh of relief to see the Briton leave. Although it was a good victory, he had lost a lot of good men that he could ill afford to.

The battle at the end of Turn 3

This game only lasted three full turns plus the Combat of Champions round. A lot happened in this battle that made for an exciting narrative, but the Crushing Victory of the Romans means that Lucius Valerius Corvus can be proud of his small contingent. The next battle may not be as decisive.

Campaign Score: Romans 3 Briton 0

Thursday, 8 May 2025

Midgard : Campaign Scenario 1 : Battle

The recent Mayday Bank Holiday on Monday allowed me to get onto the dining room table and play the first game in my Midgard : Britannia campaign. Although the table is only 6' x 3', i.e. not the correct size for a standard game, I was able to set up the table within the parameters stated within the rulebook.

This battle report is for the first encounter between the Romans and the Britons in this campaign game - it is also my very first time playing after just one read through the rulebook - please forgive any glaring rules breaches (not intentional), and I am more than happy for advice on how to run the game more smoothly by more experienced players (please critique in the post's comments). I am playing the game solo, so will be using some pre-determined tactics gleaned from my reading of various historial sources (although I will be taking liberties and simplifying them a lot).

Both armies are evenly matched (300pts):

Starting Positions

Britons:

The Britons

Total Points = 291 (Heroes 97pts, Units 194pts)
Total Rep = 33
Rep Tokens = 9
Main battle tactics = snipe from the wings, a couple of infantry charges by the standard warriors, a third charge by the elites, and a final all-in before retiring or pursuit

Romans:

The Romans

Total Points = 299 (Heroes 99pts, Units 200pts)
Total Rep = 30
Rep Tokens = 8
Main battle tactics = archers snipe from the left wing, cavalry harass from the right wing, legionaries advance centrally to grind down the opposition's warriors

For this battle, I used Scenario 1 from the main Midgard rulebook : Battle

The playing area is 6' by 3' (the size of my dining room table), so a little smaller than recommended, but I was able to get the deployments to the correct distances on the table.

I rolled that the Britons would be the defenders (they are guarding the way between the Roman retreat and their next port of call - a small Roman defensive outpost) and they took Deployment Zone A. Therefore, the Romans are classed as the attackers and took Deployment Zone B.

I have not used the rules for number of units per commander, as I wanted this to be more of a narrative battle than a strict rules sticking exercise in this respect - I may see how that goes with later games.

Combat of Champions (Reputation B9, R8):

Britons roll 9, Romans roll 7. Britons offer a challenge (randomly rolled to see who represents the armies).

Luconianus (1) steps forward, as does Marcus Aurelius Bellator (2)

Luconianus's Proud Trait works well with this random choice and Marcus Aurelius works well as being the toughest in the Roman army with Battle Smiter deed - looks like quite a mismatch though...

Luconianus = 1 Combat Dice + 1 Mighty Deed
Marcus Aurelius = 2 Combat Dice + Battle Smiter + 2 Mighty Deeds
 
Marcus Aurelius vs. Luconianus
 
Round 1:
Both go all in (L= 6,3 M= 5,5,4,3,3)
Luconianus loses and dies as only 1 Stamina (Food for Ravens) (+1 for higher opponent, -2 Rep)
Marcus Aurelius gains +3 Reputation (+1 for wound, +2 for winning)

First blood to Rome

Britons -1 Rep, Romans +3 Rep

Turn 1 (Reputation B8, R11):

The Roman centre and archers advance two moves (2ST) towards the Britons' lines, and the Cavalry advance one move (2ST).

Roman Archers shoot at Briton Archers - 3 / 0 hits. Briton archer unit loses 1 Stamina but passes Command Test.

The Britons all move forward their maximum.

Briton archers shoot at Roman archers - 1 / 0 hits. Romans fail Command Test and retreat (0.5ST)

Briton Slingers shot at Roman legionaries - 0 /0 hits.

End of Turn One

From Britons' perspective

From Romans' perspective

Turn 2 (Reputation B8, R11):

The Roman cavalry move into contact with the skyclad units who do not attempt to evade (not in their psyche), the legionaries move into contact with the warriors, and the archers move forward to gain better range against the Briton archers and warriors.

The Roman archers shoot at:
  • the Briton archers - 5 hits (used 1 Mighty Deed to add an extra die) - unit destroyed (-2 Rep)
  • the Briton warriors - 3 hits - lose 1 stamina fail Command Test and retreat (0.5ST)
Roman melee:
  • starts with Lucius Valerius charging the Briton skyclad warriors (+3 Rep - charge and 1st charge of game, charge by Army Commander) causes 1 stamina damage to skyclad. Skyclad cause 2 stamina damage. Both leaders OK but Roman cavalry destroyed (-2 Rep)
  • second Roman cavalry turma charges Briton skyclad warriors causes 1 stamina damage. Skyclad fail to cause damage (Relentless trait says that unit will not retreat but lose extra stamina - this would destroy the unit - I decided not to play that part otherwise skyclad will be too weak and be destroyed by just one hit)
  • legionaries attack Briton warriors causing 2 stamina damage on each Briton warrior unit. Britons retaliation; Bellicus's unit causes 1 stamina damage from Legendary Weapon, and another warband causes 1 stamina to another legionary unit - all pass their command tests

The Britons moved up their reserves, with one unit of warriors contacting a unit of Roman archers.

The Briton skirmishers shoot at the Roman archers but miss

Briton melee:

  • the warriors attacking the Roman archers cause 1 stamina damage but they pass their command test
  • Bellicus's unit causes 1 stamina damage from Legendary Weapon but no other hits. Roman retaliation: Bellicus's unit destroyed (-2 Rep), but Bellicus is OK. One more unit destroyed (-2 Rep) and the other takes a further 1 stamina damage but makes save
End of Turn Two

From Britons' perspective

From Romans' perspective

Turn 3 (Reputation B4, R12):

It was at this point I realised that I had been playing the Roman archers incorrectly - as they are not skirmishers, they shouldn't have shot until phase 6 of each turn. I don't think it would have made any difference but I will play it correctly from this point onwards. I also realised I hadn't been using the extra 0.5ST move required when a move is made into combat, so adjusted the alignment of a few units.

The Roman archers, as they were better armed and armoured than their Celtic counterparts decided to move in and attack them in hand-to-hand combat. The rest of the force decided to hold their positions in a shield wall formation to see what the elite Briton warriors would do, leaving the cavalry to finish off the skyclad if they can.

Roman Melee:

  • Lucius Valerius, on his own rolls for his life - 2 hits. Maviloduus, using Favour of the Gods trait, with the injured skyclad failed to hit. Lucius Valerius forced the Britons to retreat, but decides to Hold Fast (+1Rep). Bit of a difficult one this - skyclad I see as not retreating but rules state must lose stamina instead. As per last turn, I will not enforce this but will make an amendment that says Lucius can break from combat without the subsequent Rep loss as he won the combat. Moved him back 0.5ST - He can move freely next round, but as the Britons lost I will say that they cannot move into combat with him this round
  • Roman cavalry cause 1 stamina damage to the skyclad, who are wiped out (-2Rep). Skyclad cause 1 hit
  • Legionaries attack warriors causing 2 stamina damage - unit destroyed (-2Rep). Warriors cause 2 hits
At this point the Briton army is at 0 REP - they need to pull something out of the bag in their half of the turn to stay on the field
  • Legionaries attack Bellicus - 2 hits. Bellicus, using his Legendary Weapon causes 1 stamina and 2 other hits. Bellicus forces legionaries to retreat (+1Rep)
  • Archers attack warriors - lots of 5s and 6s here - 3 stamina caused warriors to be destroyed (-2Rep)
  • Archers with Gaia attack archers causing 1 stamina. Britons caused 1 stamina in return and Gaia loses 1 stamina for failing Risk to Heroes roll

The Britons move up their elite infantry and slingers who shoot at the cavalry and a unit of legionaries, causing the cavalry to retreat.

Briton melee:

  • Bellicus joined the elite infantry as they pass by him to meet the legionaries (+1Rep) - His Legendary Weapon causes 1 stamina and 3 extra hits are landed - unit destroyed (-3Rep)
  • Archers attack Gaia's archer unit - Britons destroyed (-2Rep)
End of Turn 3

From Britons' perspective

From Romans' perspective

Denouement (Reputation B-2, R10):

This was a Crushing Victory for the Romans. There were some lucky dice rolls and maybe the Britons' set up could have been better; I definitely should have got the elite warriors into combat sooner, but I didn't expect the other units to fall so quickly. That said, the Romans do have some wounds to lick and they will lose a few more units due to consolidation (more on force updates etc. in the next post).

There were a few lessons learned - the legionaries are tough, as are level 3 heroes. The skyclad gave a good account of themselves with my minor rules tweak (which I think suits them well) and formed archers can hit big time in combat when required. That said, (most other) skirmishers need to be kept out of combat as they are very fragile. Next time I will play the Britons slightly differently, but I think the Roman tactics suited what they had on the table, so they will remain unchanged.

This game took me quite a number of hours to complete - maybe 4 or 5 in total with a few breaks. As I had only read the rulebook once through, I found myself constantly digging back into the rules and the QRS for guidance as there are lots of things to keep in mind when playing. It probably didn't help that I was trying to play both sides in this battle. I am still not 100% with all of the mechanics but it is getting there. The next game should not take anywhere near as long to complete.

The units involved:

Britons:

Bellicus and warriors

Luconianus and archers

Maviloduus with skyclad and slingers

Romans:

Gaia Pomponia and archers

Lucius Valerius and cavalry

Marcus Aurelius and legionaries
 
Next post should be a more prosaic (well as prosaic as I can manage) account of the battle. After that I will then detail how each side fared and what reinforcements will be allocated. Hopefully I should have some tables for reinforcements etc. that can be used going forward.