The recent Mayday Bank Holiday on Monday allowed me to get onto the dining room table and play the first game in my Midgard : Britannia campaign. Although the table is only 6' x 3', i.e. not the correct size for a standard game, I was able to set up the table within the parameters stated within the rulebook.
This battle report is for the first encounter between the Romans and the Britons in this campaign game - it is also my very first time playing after just one read through the rulebook - please forgive any glaring rules breaches (not intentional), and I am more than happy for advice on how to run the game more smoothly by more experienced players (please critique in the post's comments). I am playing the game solo, so will be using some pre-determined tactics gleaned from my reading of various historial sources (although I will be taking liberties and simplifying them a lot).
Both armies are evenly matched (300pts):
 |
| Starting Positions |
Britons:
 |
| The Britons |
Romans:
 |
| The Romans |
For this battle, I used Scenario 1 from the main Midgard rulebook : Battle
The playing area is 6' by 3' (the size of my dining room table), so a little smaller than recommended, but I was able to get the deployments to the correct distances on the table.
I rolled that the Britons would be the defenders (they are guarding the way between the Roman retreat and their next port of call - a small Roman defensive outpost) and they took Deployment Zone A. Therefore, the Romans are classed as the attackers and took Deployment Zone B.
I have not used the rules for number of units per commander, as I wanted this to be more of a narrative battle than a strict rules sticking exercise in this respect - I may see how that goes with later games.
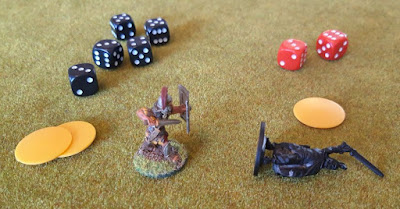
Combat of Champions (Reputation B9, R8):
Britons roll 9, Romans roll 7. Britons offer a challenge (randomly rolled to see who represents the armies).
Luconianus (1) steps forward, as does Marcus Aurelius Bellator (2)
Luconianus's Proud Trait works well with this random choice and Marcus
Aurelius works well as being the toughest in the Roman army with Battle Smiter deed - looks like quite a mismatch though...
 |
| Marcus Aurelius vs. Luconianus |
 |
| First blood to Rome |
Turn 1 (Reputation B8, R11):
The Roman centre and archers advance two moves (2ST) towards the Britons' lines, and the Cavalry advance one move (2ST).
Roman Archers shoot at Briton Archers - 3 / 0 hits. Briton archer unit loses 1 Stamina but passes Command Test.
The Britons all move forward their maximum.
Briton archers shoot at Roman archers - 1 / 0 hits. Romans fail Command Test and retreat (0.5ST)
Briton Slingers shot at Roman legionaries - 0 /0 hits.
 |
| End of Turn One |
 |
| From Britons' perspective |
 |
| From Romans' perspective |
Turn 2 (Reputation B8, R11):
The Roman cavalry move into contact with the skyclad units who do not attempt to evade (not in their psyche), the legionaries move into contact with the warriors, and the archers move forward to gain better range against the Briton archers and warriors.
- the Briton archers - 5 hits (used 1 Mighty Deed to add an extra die) - unit destroyed (-2 Rep)
- the Briton warriors - 3 hits - lose 1 stamina fail Command Test and retreat (0.5ST)
- starts with Lucius Valerius charging the Briton skyclad warriors (+3 Rep - charge and 1st charge of game, charge by Army Commander) causes 1 stamina damage to skyclad. Skyclad cause 2 stamina damage. Both leaders OK but Roman cavalry destroyed (-2 Rep)
- second Roman cavalry turma charges Briton skyclad warriors causes 1 stamina damage. Skyclad fail to cause damage (Relentless trait says that unit will not retreat but lose extra stamina - this would destroy the unit - I decided not to play that part otherwise skyclad will be too weak and be destroyed by just one hit)
- legionaries attack Briton warriors causing 2 stamina damage on each Briton warrior unit. Britons retaliation; Bellicus's unit causes 1 stamina damage from Legendary Weapon, and another warband causes 1 stamina to another legionary unit - all pass their command tests
The Britons moved up their reserves, with one unit of warriors contacting a unit of Roman archers.
The Briton skirmishers shoot at the Roman archers but miss
Briton melee:
- the warriors attacking the Roman archers cause 1 stamina damage but they pass their command test
- Bellicus's unit causes 1 stamina damage from Legendary Weapon but no other hits. Roman retaliation: Bellicus's unit destroyed (-2 Rep), but Bellicus is OK. One more unit destroyed (-2 Rep) and the other takes a further 1 stamina damage but makes save
 |
| End of Turn Two |
 |
| From Britons' perspective |
 |
| From Romans' perspective |
Turn 3 (Reputation B4, R12):
It was at this point I realised that I had been playing the Roman archers incorrectly - as they are not skirmishers, they shouldn't have shot until phase 6 of each turn. I don't think it would have made any difference but I will play it correctly from this point onwards. I also realised I hadn't been using the extra 0.5ST move required when a move is made into combat, so adjusted the alignment of a few units.
The Roman archers, as they were better armed and armoured than their Celtic counterparts decided to move in and attack them in hand-to-hand combat. The rest of the force decided to hold their positions in a shield wall formation to see what the elite Briton warriors would do, leaving the cavalry to finish off the skyclad if they can.
Roman Melee:
- Lucius Valerius, on his own rolls for his life - 2 hits. Maviloduus, using Favour of the Gods trait, with the injured skyclad failed to hit. Lucius Valerius forced the Britons to retreat, but decides to Hold Fast (+1Rep). Bit of a difficult one this - skyclad I see as not retreating but rules state must lose stamina instead. As per last turn, I will not enforce this but will make an amendment that says Lucius can break from combat without the subsequent Rep loss as he won the combat. Moved him back 0.5ST - He can move freely next round, but as the Britons lost I will say that they cannot move into combat with him this round
- Roman cavalry cause 1 stamina damage to the skyclad, who are wiped out (-2Rep). Skyclad cause 1 hit
- Legionaries attack warriors causing 2 stamina damage - unit destroyed (-2Rep). Warriors cause 2 hits
- Legionaries attack Bellicus - 2 hits. Bellicus, using his Legendary Weapon causes 1 stamina and 2 other hits. Bellicus forces legionaries to retreat (+1Rep)
- Archers attack warriors - lots of 5s and 6s here - 3 stamina caused warriors to be destroyed (-2Rep)
- Archers with Gaia attack archers causing 1 stamina. Britons caused 1 stamina in return and Gaia loses 1 stamina for failing Risk to Heroes roll
The Britons move up their elite infantry and slingers who shoot at the cavalry and a unit of legionaries, causing the cavalry to retreat.
Briton melee:
- Bellicus joined the elite infantry as they pass by him to meet the legionaries (+1Rep) - His Legendary Weapon causes 1 stamina and 3 extra hits are landed - unit destroyed (-3Rep)
- Archers attack Gaia's archer unit - Britons destroyed (-2Rep)
 |
| End of Turn 3 |
 |
| From Britons' perspective |
 |
| From Romans' perspective |
Denouement (Reputation B-2, R10):
This was a Crushing Victory for the Romans. There were some lucky dice rolls and maybe the Britons' set up could have been better; I definitely should have got the elite warriors into combat sooner, but I didn't expect the other units to fall so quickly. That said, the Romans do have some wounds to lick and they will lose a few more units due to consolidation (more on force updates etc. in the next post).
There were a few lessons learned - the legionaries are tough, as are level 3 heroes. The skyclad gave a good account of themselves with my minor rules tweak (which I think suits them well) and formed archers can hit big time in combat when required. That said, (most other) skirmishers need to be kept out of combat as they are very fragile. Next time I will play the Britons slightly differently, but I think the Roman tactics suited what they had on the table, so they will remain unchanged.
This game took me quite a number of hours to complete - maybe 4 or 5 in total with a few breaks. As I had only read the rulebook once through, I found myself constantly digging back into the rules and the QRS for guidance as there are lots of things to keep in mind when playing. It probably didn't help that I was trying to play both sides in this battle. I am still not 100% with all of the mechanics but it is getting there. The next game should not take anywhere near as long to complete.
The units involved:
Britons:
 |
| Bellicus and warriors |
 |
| Luconianus and archers |
 |
| Maviloduus with skyclad and slingers |
Romans:
 |
| Gaia Pomponia and archers |
 |
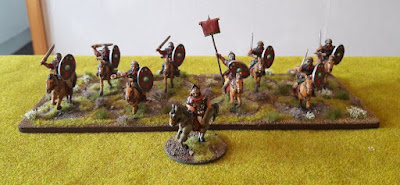
| Lucius Valerius and cavalry |
 |
| Marcus Aurelius and legionaries |
No comments:
Post a Comment